Calm, the meditation and sleep app with over 4 million users worldwide, has joined forces with Spotify in an unprecedented collaboration. This partnership aims to provide a range of transformative content from Calm to support individuals on their mental health journey. The content is now accessible on Spotify’s platform.According to Engadget, the collaboration between Calm and Spotify is made possible through Spotify Open Access (SOA), an initiative introduced in 2021. SOA enables companies to offer paid content on Spotify, catering to different subscriber tiers. This means that users can access and enjoy paid content from other platforms, such as books or articles they have purchased, directly on Spotify.
It is important to note that a Premium subscription to Calm is required to gain access to all its content on Spotify. Otherwise, only a limited set of stories and music is available for streaming on Spotify.
Recognizing the challenge of finding time for mindfulness amidst daily life’s busy demands, Calm has partnered with Spotify, making some of its finest content readily available in the Spotify podcast catalog.
With eleven Calm shows now on Spotify, individuals can benefit from a range of mental well-being support. The content includes some of the most popular sleep stories, meditations, mindfulness exercises, and more, all designed to facilitate better sleep, reduce stress and anxiety, and cultivate mindful habits.
The strategic collaboration between Calm and Spotify brings significant advantages for both parties. Calm’s esteemed content gains access to Spotify’s vast user base of approximately 515 million monthly active users, amplifying its reach and impact.
The partnership between Calm and Spotify provides an exciting opportunity for users to conveniently enhance their mental well-being. By leveraging the power of Spotify Open Access, Calm’s transformative content is now just a click away for individuals seeking relaxation, stress reduction, and better sleep.
Elon Musk publicly announced the establishment of xAI, a startup that aims at exploring “the true nature of the universe” and will also compete against OpenAI’s well-known chatbot ChatGPT.
ChatGPT security risks
“The goal of xAI is to understand the true nature of the universe,” the website said.
State records show that Musk’s registered business, x.AI, is situated in Nevada. The new business revealed on its website that Musk will oversee its core group of employees.
The xAI team is made up of engineers from well-known software businesses, including those from competing companies like OpenAI, which launched ChatGPT.
Musk tweeted that the xAI team intended to do live sessions using Twitter Spaces on Friday, July 14, giving users the chance to engage with the team and ask them questions about their work.
In reaction to recent releases of chatbots like GPT from OpenAI, Bard from Google, and Claude from Anthrapic, this action has been taken.
Announcing x.AI on its website
Elon Musk has already spoken out on the moral issues raised by AI and even written an open letter calling for a halt to the field’s advancement.
Musk appears to have grabbed the reins of advancing technology this time around by directing the team in the development of xAI.
Team In The Development OfxAI
Greg Yang, a former DeepMind developer and Google research scientist, is an important member of the team.
According to the records, Musk is the only director of the business, and Jared Birchall, managing director of Musk’s family office, is the secretary. The x.AI team will also receive advice from Dan Hendricks, the head of the Centre for AI Safety.
And what are the most fundamental unknown questions?
Once you know the right question to ask, the answer is often the easy part, as my hero, Douglas Adams, would say. pic.twitter.com/Bo6v8E1Ooq
Further demonstrating the company’s dedication to advancing the discipline, xAI’s website now provides employment possibilities for anyone in the Bay Area interested in AI development.
According to reports, Musk has tightly linked the x.AI team with his other businesses, such as Twitter, Tesla, and SpaceX. The introduction of OpenAI’s chatGPT, followed by Bard and Bing, has heightened interest in generative AI.
Google’s first foldable, the Pixel Fold is now out. And there’s a whole lot new here in how you can use the phone. Like split screen and much more. But you can also still take a screenshot on it, as you might expect. The method is the same as any other Pixel device, but if you’ve never used a Pixel smartphone, then you may be wondering how to do it. Well, here’s how you can do just that.
How To Take A Screenshot On The Google Pixel Fold
There are four different ways that you can take a screenshot on the Google Pixel Fold. And we’re here to outline each way. So you can choose which one works best for you. Whether it’s with the buttons, software buttons, or Google Assistant.
Using the buttons
Probably the oldest way to take a screenshot on Android is with the buttons. This has been a thing since around Android 4. And here’s how you can do that.
Press Power and Volume Down keys together for a few seconds.
You’ll see the screen flash, and a screenshot appear at the bottom of the screen with a few options for editing and capturing a scrolling screenshot.
And that’s it.
Using the Recents menu
Another way to take a screenshot is through the Recents menu. Here’s how you can do that:
Swipe up from the bottom of your screen until the Recents screen comes up.
Tap on the “Screenshot” button below the app that is currently open.
It will now take a screenshot of the active app. Which is super useful.
That’s all there is to it. You’ll get the same notification as you do in any other screenshot method.
Taking a scrolling screenshot
New in Android 12, you can now take a scrolling screenshot. This is a feature that many other smartphone makers have had in their phones for years. And here’s how you can take a scrolling screenshot (we have a much more in-depth tutorial on that here).
Capture your screenshot using the Power and Volume Down buttons as mentioned above. This will not work from the Recents menu.
Now, you’ll see an option in the screenshot UI to “Capture More”. Tap on that.
Here, you can crop how much of the screen yo want to capture. Whether it is the entire page, or just more than what is shown on your screen currently.
Hit the “Save” button in the upper left-hand corner.
And that’s it. That’s how you can take a scrolling screenshot.
Using Google Assistant
Finally, you can use the Google Assistant to take a screenshot on the Pixel Fold as well. So you can do it without using your voice. Here’s how you can do it:
Activate the Assistant by saying “Hey Google”, or swiping up from the bottom corners of the screen.
Once the Google Assistant is awake and listening, say “Take a screenshot”.
That’s it.
Now, if you get an error here, it likely means that the Assistant does not have permission to take a screenshot. You can fix that by doing the following:
Go into Settings.
Tap on Apps & Notifications.
Then tap on Advanced.
Then tap on Default Apps.
And Assist & Voice input.
Now, toggle on “Use Screenshot”.
And that’s the many ways that you can take a screenshot on the Google Pixel Fold.
Ever since the advent of ChatGPT and the subsequent start of the AI revolution, tech leaders like Elon Musk have worried that this unregulated and rampant development in the field could lead to some major consequences. Now, in a surprising turn of events, Elon Musk has launched his own AI company called xAI, whose mission is to “understand the true nature of the universe” and compete with the likes of ChatGPT and Google Bard.
While specific details about the company’s work and motives remain unclear, xAI will host a Twitter Space on July 14th, allowing users to virtually meet the team behind xAI and inquire about their endeavours.
The xAI team, spearheaded by Elon Musk himself, comprises several prominent figures from major AI institutions such as DeepMind, OpenAI, Google Research, Microsoft Research, and Tesla. Team members include Igor Babuschkin, Manuel Kroiss, Yuhuai (Tony) Wu, Christian Szegedy, Jimmy Ba, Toby Pohlen, Ross Nordeen, Kyle Kosic, Greg Yang, Guodong Zhang, and Zihang Dai. Additionally, Dan Hendrycks, the director of the nonprofit Center for AI Safety, will lend his expertise to the company.
“I remain unbiased and do not have the incentive to limit my criticism,” said Hendrycks.
It is important to note that the project has been in development for several months and will operate as a separate entity from Musk’s overarching X Corp. However, xAI will maintain close collaboration with X (Twitter), Tesla, and other affiliated companies.
Why is Musk founding another AI company?
Although Musk himself helped found OpenAI back in 2015, his recent decision to establish another AI company stems from an open letter earlier this year, which called for a temporary halt in AI progress. This is because Musk and other prominent experts in the field worry that the race between companies to build the most advanced AI system could wreak havoc on society.
“An out-of-control race to develop and deploy ever more powerful digital minds that no one – not even their creators – can understand, predict, or reliably control,” stated the letter.
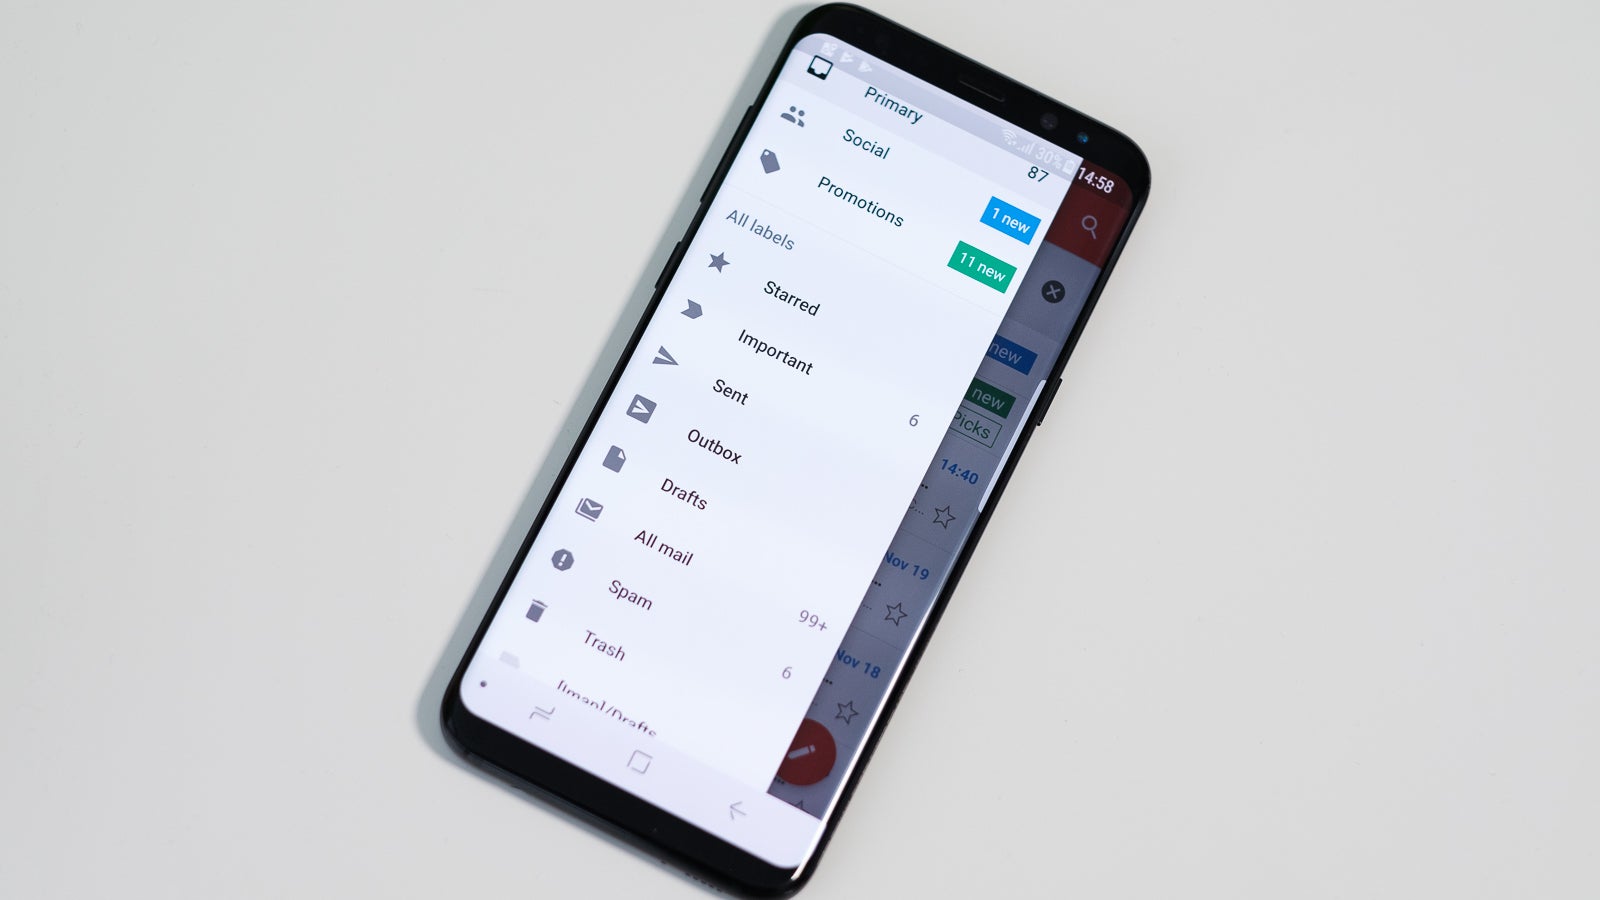
Google has just announced plans to roll out a new feature for Gmail users that will make it possible to schedule their meetings in Calendar without having to leave the app. Although this feature was previously available, you had to exit Gmail in order to create new Calendar events and schedule your meetings.With the new scheduling tool available in Gmail, users can do that quick and easy without leaving the app. Once you get the update, a new Calendar icon with all Calendar-related actions will be visible while composing an email.
Clicking the new Calendar icon will open up the calendar where you’ll be able to select and add meeting times direction from your calendar into the email without leaving Gmail. Obviously, the recipient of the email can review the proposed meeting times and select one directly from the email to automatically get an email with a calendar invite.
The same feature allows Gmail users to quickly schedule a meeting and share the event information back in the email. An event summary is inserted into the email body to make it easier to share. This is the same option that was previously available in the three dot menu on top of the email conversation view, but now it’s more conveniently accessible via the new Calendar icon.
Google notes that users can create events from Gmail on any of the primary and secondary calendars. On the other hand, time suggestions can only be made for your primary calendar currently and only work for 1:1 meetings. Only the first person to book an appointment will be added to the event if multiple people are included in the recipient list.
The new features will be enabled by default and the rollout should take up to 15 days starting July 11 for those in the Rapid Release domains. Everyone else should start seeing these new features beginning July 31.
Apple has recently released new Rapid Security Response (RSR) patches to fix a zero-day vulnerability. This vulnerability has been exploited in attacks and affects iPhones, Macs, and iPads that have been fully patched.
The zero-day vulnerability has been tracked as CVE-2023-37450, and this vulnerability was identified by an anonymous cybersecurity researcher.
The new Rapid Security Response (RSR) program if Apple rolls out a second patch, fixing a critical zero-day flaw across various Apple products like:-
iOS for iPhone
iPadOS for iPad
macOS Ventura for Mac
Safari for macOS Big Sur and Monterey
Apple WebKit Zero-DayFlaws
Apple’s silence leaves the reason undisclosed, but Safari glitches emerged after user-agent detection failure for Zoom, Facebook, and Instagram, impacting website rendering.
Rapid Security Response updates swiftly deliver zero-day fixes for iPhones and Macs, prioritizing critical patches over regular OS updates for user protection.
RSR updates alter user agents on iOS devices, appending the “(a)” string to the new updates as follows:-
iOS 16.5.1 (a)
iPadOS 16.5.1 (a)
macOS Ventura 13.4.1 (a)
Soon after Apple’s patch release for CVE-2023-37450, users encountered access errors on several websites post-installation, prompting complaints.
Apple acknowledges Rapid Security Responses impacting website display, so they will soon fix it with the upcoming updates:-
iOS 16.5.1 (b)
iPadOS 16.5.1 (b)
macOS 13.4.1 (b)
Remove Buggy Security Update
While the users who have already installed the buggy security updates on their Apple devices and while browsing the web face any issues, make sure to remove the updates from your device.
To do so, you have to follow the simple steps that we have mentioned below:-
Open the Settings app on your iPhone or iPad.
Scroll down and tap on “About.”
Look for the “iOS Version” option and tap on it.
On the iOS Version page, locate and tap on “Remove Security Response.”
A confirmation prompt will appear. Tap on “Remove” to confirm the action.
That’s it; now you are done.
The below-mentioned steps are for Mac:-
First of all, you have to click on the Apple logo or menu located in the top left corner of the screen.
From the dropdown menu, select “About This Mac.”
In the “About This Mac” window, click on “More Information.”
Next to the macOS version number, you will see an Info (i) button. Click on it.
A new window will appear with additional details about the macOS version.
In the new window, look for the “Remove” option and click on it.
A confirmation dialog box will appear. Click on “Remove” to confirm the action.
Once the removal process is complete, now you will be prompted to restart your Mac.
Click on “Restart” to restart your Mac.
That’s it now, you are done.
Apple’s WebKit browser engine carries this zero-day flaw (CVE-2023-37450), enabling arbitrary code execution through targeted web pages with manipulated content.
In total, there are ten zero-day vulnerabilities that were fixed by Apple this year for its following product line:-
Zero-days Fixed this Year by Apple
Here below, we have mentioned all the Zero-days fixed this year by Apple this year:-
Apple’s flawed Rapid Security Responses risk user resistance if issues persist, damaging the intended purpose of swift patch deployment.
After some time of waiting, we’re finally able to try out Threads, Meta’s answer to Twitter. People are cracking into the app, and they’re finding out all of the stuff that they can do. On the opposite side of that coin, they’re also finding out what they can’t do in Threads. Here’s a rundown of those things.
This isn’t meant to turn you away from the app. By all means, try it out and see what “Zuck” has up his sleeves. One thing to note, however, is that you should expect the app to add functionality over time. There are things you can’t do now, but that might not be the case a couple of months or even weeks from now. Just keep that in mind.
Before we get started, what is Threads?
In case you’re not familiar with this app, this is Meta’s version of Twitter. It’s a social media app that’s tied to Instagram, according to the company. However, there’s not much tying it to Instagram outside of the fact that you can log in with your Instagram credentials.
It follows the Twitter formula closely. You can make text-based posts, and they’ll be presented on an ever-scrolling feed. Along with text, you’re also able to post photos and videos.
What you can’t do in Meta’s Threads
So, you just downloaded Threads and you’re one of the over 100 million people threading along. That’s all fine and dandy. However, in this early stage of the platform, you’re going to quickly realize that there are some things that you won’t be able to do.
No DMs: Sorry, no sliding today
One core aspect of social media is being able to quickly and easily send a message to another person or group. This is why all major social media platforms have a DM (Direct Messaging) function. However, Threads doesn’t let you message other people as of yet.
That’s weird seeing as Instagram has a DM function, and Threads and Instagram are conjoined twins. It’d be nice if Meta could give us a messaging function for Threads.
However, since Threads and Instagram are so closely related, it’d be neat if the company could give us a unified messaging experience. If your Threads messages and Instagram messages could exist in the same inbox on both apps.
When you open your inbox on either app you’ll have a tab that will show just your Instagram messages and a tab that just shows your Threads message. There could also be a tab that shows both. We’ll have to wait to see what Meta plans to do.
Post GIFs from your keyboard: You have to work for it…
We all know that GIFs are like a second language to most of us. We’re able to post them on Twitter as an illustrated response to someone’s hot take. Recently, people gained the ability to post them on Instagram. When it comes to Threads, you can post them, but there’s a catch.
You’re not able to post them straight from your keyboard. Digital keyboards like Gboard have a GIFs tab that provides GIFs for you to insert with a single tap. If you try to do so, you’ll be met with disappointment.
How to insert GIFs
You can insert GIFs into your Threads and replies, but it just involves a few extra steps. You will need to download the GIF from the internet and insert the GIF as an attachment. You’ll want to search for the GIF using the search engine of your choice. Save the GIF to your device. Just make sure you’re downloading the actual .gif file and not a jpeg or png.
After you download the file, go to the Threads app and start your post or reply. Tap on the little paperclip icon under the text field. The app will then bring up the media picker UI. After you insert the GIF, you should be able to see it moving before you actually post it.
If you’re using Gboard, then this process will be a bit easier. Search for the GIF you want in the GIF tab on the Gboard. Tap on it. You’ll get the error message, yes, but you’ll see the “Go to link” icon appear over the GIF you tapped- the box with a little arrow pointing outward. Tapping on it will bring you to the actual URL of the GIF. Hold your finger on the GIF and save it. The rest of the process will remain the same.
See a timeline of just those you follow: We get it, celebrities exist!
Sorry to break this to you, but just like with other social media sites, you’re fighting the algorithm with Threads. It’s tough for the little guy to get noticed on social media. Most people post photos and videos to a handful of views while others wrack up millions. One unfortunate thing about this is that celebrities, influencers, and famous content creators are a shoo-in to gain millions of followers, views, likes, and comments.
In the case of Threads, it’s much the same. When you sign into Threads, you’ll be greeted by a feed of mostly super famous people. You’ll see celebrities and influencers who you didn’t even follow. You’ll see their follower count skyrocket by the second while yours doesn’t as fast.
However, Instagram fixed its feed issue by offering a Followed feed. This is something that people want to see from Threads. The super famous individuals already have millions of followers across the internet. Threads is a new platform, a chance for a new start, and probably a new community of people. It’s a bit of a smack to the face having the same thing happen as with other platforms.
Trim videos: You have to use other apps… darn
Threads gives you the ability to post pictures and videos. You can post videos up to several minutes in length, but if you exceed the maximum length for a video, you won’t be able to quickly trim the fat to make it fit.
After you select the video from your media library, you’ll just get a preview of the video, and that’s it. If you tap on the video, you’ll be brought back to the media picker UI. Also, if the video is too long, it seems that the app will attempt to upload it and give you a “Failed to upload” message. Hopefully, the app will allow you to trim your videos.
Edit photos: Zuckerberg, are you sure this is an Instagram app?
Threads is an Instagram app, and it’s heavily riding its parent app’s coattails. However, if you’re planning on uploading an image, then you’ll be met with a bare-bones experience. You’re not able to crop your photos before posting them. Also, you’re not able to add filters or make any adjustments.
AH Instagram Logo 1 newAH
You’re given a rudimentary photo editing experience on Instagram. You’re able to crop your photo, adjust the colors and brightness, apply effects, and more. Hopefully, Threads will inherit some of Instagram’s photo editing prowess.
Delete your account without deleting your Instagram account: Ride together, die together
Everyone experiences buyer’s remorse (or the equivalent of signing up for an account only to find out that you hate it), and we’ve found ourselves searching for the “Delete account” button from time to time.
In the case of Threads, if you decide that you don’t want to keep your account around, the only way that you can get rid of your Threads account is to delete your Instagram account in the process. That’s a bummer.
It feels like Meta built Threads off of Instagram just to rush it to the market and capitalize on Elon Musk going down with the ship. Thus, Threads might be so tied to Instagram that they’re basically conjoined. If that’s the case, then Meta dropped the ball.
The company stated that it’s looking for a way for users to delete accounts separate from one another. It seems odd that the company is trying to figure this out for its own app. In any case, you can expect this feature eventually.
The Pixel Fold is a great looking foldable, perhaps one of the best looking ones on the market these days. But, you’re going to want to protect it, or at least make it your own. And that’s where dbrand leather comes into play. It’s a great way to make the Pixel Fold your own, without making it more bulky. It’s a foldable, so it’s already fairly heavy.
dbrand isn’t new to making skins, it’s been around for many, many years now. And it has a ton of options available for the Pixel Fold. But I really like their leather skins. This particular one is the real brown leather skin (I also have it on my MacBook Air). It also comes in real Tan and real Black colors. It costs $34.95. Which is about what you’d pay for a case.
The cool thing with dbrand is the Grip Case. So if you wanted to get a case instead, you can do that. With the Grip Case, you get to choose any skin you want, to go on that case. So you could really make that case your own. It also comes with a kickstand along the hinge of the case, making it really nice. But let’s get back into the leather skin.
dbrand’s leather will patina over time
What’s great about this skin is that it’s going to patina over time. It will take a few months to really see a big difference in how it looks, but it will look great. dbrand does offer Leather Balm to help hurry up the patina process though.
With the Pixel Fold, dbrand does give you two pieces of leather. One for the back of the phone and another for the camera bar. Honestly, I’ll probably remove the camera bar skin, as I think it looks cleaner with just the back in leather. But overall, it does look really nice.
You can pick your own leather skin for the Pixel Fold (and many other devices) by clicking the link below.
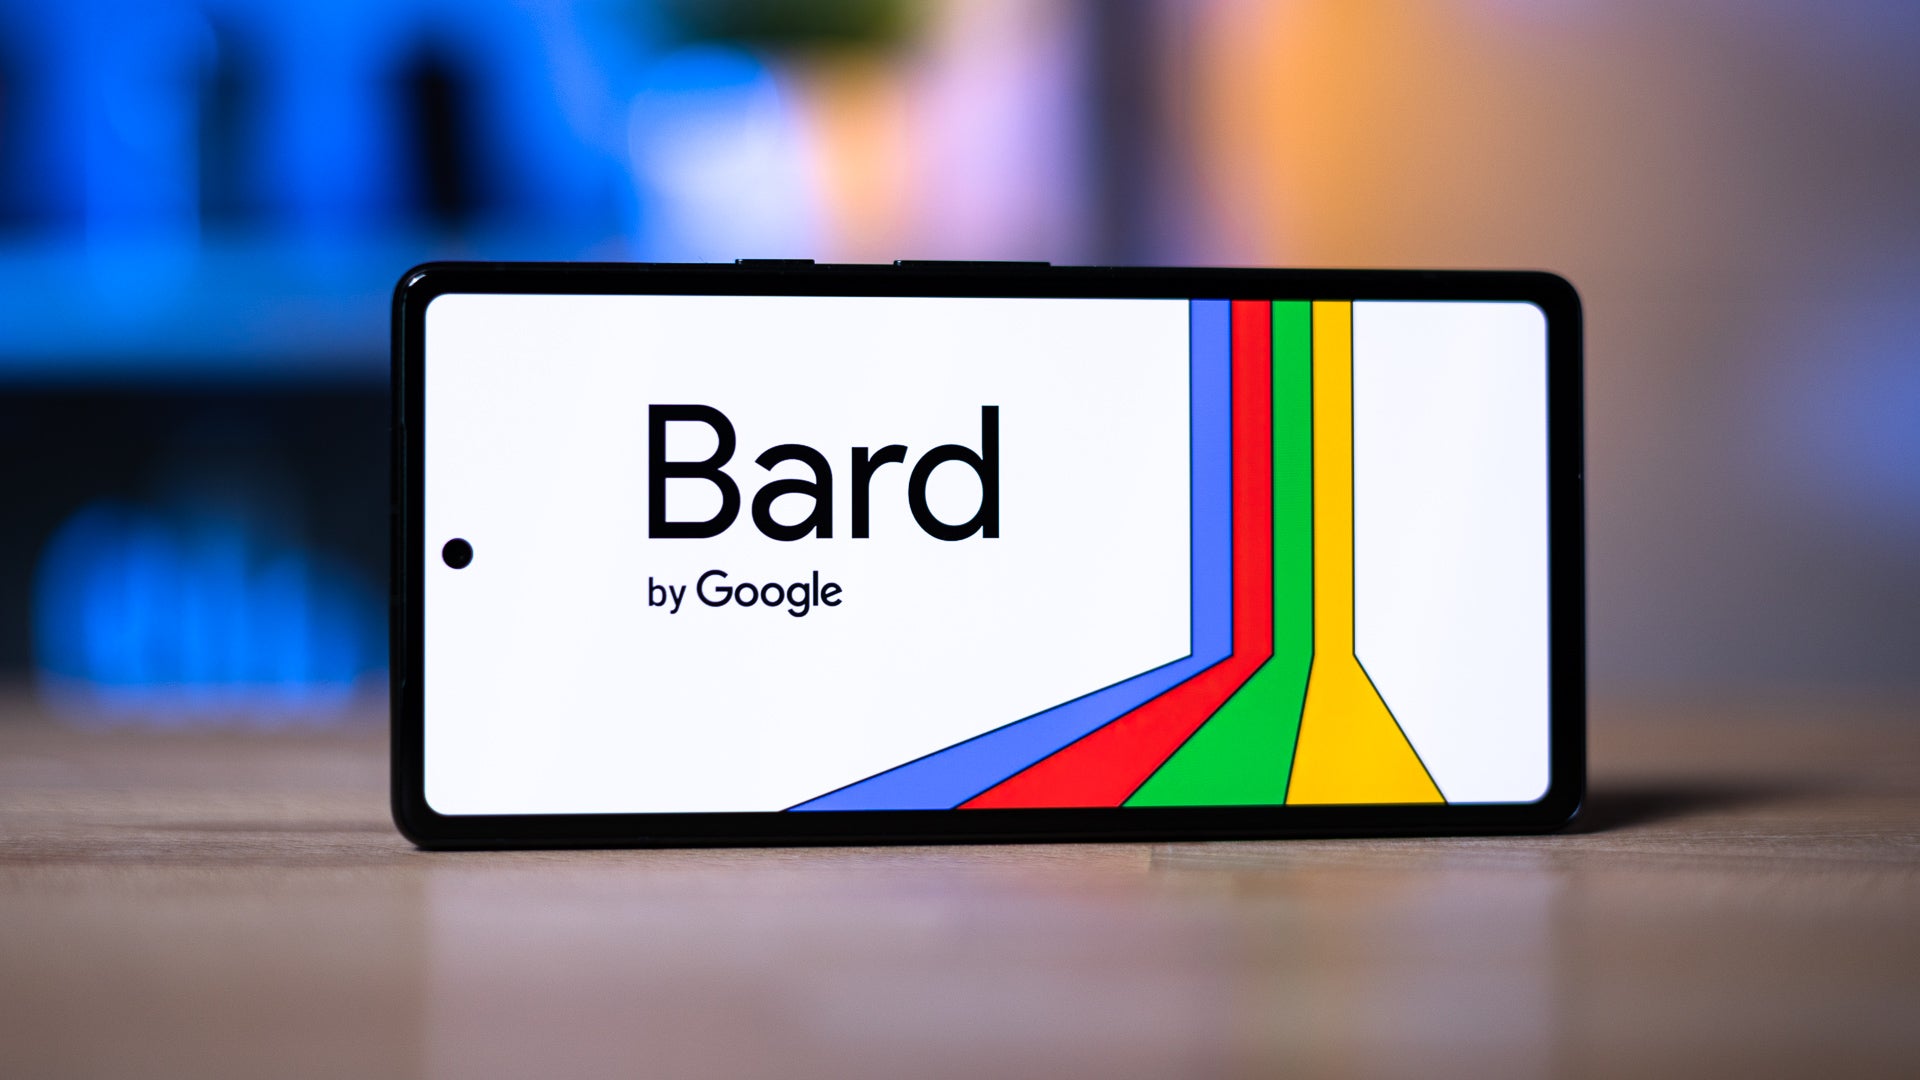
The race among tech giants in the Artificial intelligence domain is reaching new heights, and Google is turning up the heat with its project, Bard. The company is taking Bard to the next level by expanding its availability to the European Union (EU) and introducing a range of new features.
Previously, Google Bard was only available in the US and the UK. Privacy concerns prevented it from being available in the EU. Still, now that Google has changed its rules to say that it can use information that is already available to the public to help teach its computer programs how to do things, Bard is entering the EU market as well.
Google Bard can now talk
In addition to its EU expansion, Bard is also evolving its linguistic capabilities and speech recognition. Google shares that users can now experience spoken responses by entering a prompt and selecting the sound icon. This feature supports over 40 languages and is already live.
Google Bard introduces image integration
Google is also unveiling an exciting new feature that allows users to enhance their interactions by incorporating images into prompts. Users can now ask the chatbot to provide explanations, funny captions, or relevant quotes that complement the image. Although this feature is currently only available in English, Google plans to extend it to other languages soon.
Bard adds pinning, renaming, and sharing features
Google is also introducing a few other new features, including the ability to pin and rename conversations, which means you can now pick up where you left off with your past Bard conversation. ChatGPT has had this option since the begging so it was about time for Bard to catch up. Now you can also share responses with others, and change the tone and style of the answers you get back from Bard.Bard is still in its early stages, but it’s clearly growing and getting smarter. And yes, I know it is not human, I mean come on, in just a few months, it’s learned to speak 40 languages and has a bunch of new features. This proves one thing, in the battle between OpenAI’s ChatGPT and Google Bard, you have to be fast if you don’t want to drop out of the game.
While Amazon’s Prime Day did technically end on July 12th a 11:59PM PT, there are still quite a few discounts on products after Prime Day. So in this post, we’ll be rounding up the best Prime Day deals that are still available. And the best part, most of these do not require you being a Prime member.
So what kinds of deals are still available? Tons of them. That includes some great deals on Samsung monitors, on Nest products, Samsung storage and so much more.
Best Prime Day deals available after Prime Day
A few of the deals that caught our attention was the iRobot Roomba robot vacuums that are on sale. These include the Roomba i3+ which is now $399, down from $549. There’s also the Braava Jet m6 on sale for $349. And if you’re a pet owner, the iRobot Roomba j7+ is also on sale for $649, saving you a cool $150 here.
The Pixel lineup is also still on sale at incredibly low prices. This includes the Google Pixel 7a going for $449, and the Pixel 7 at $499. Unfortunately, the Pixel 7 Pro and Pixel Buds are no longer on sale. But these are still some really good deals on the Pixel 7a and Pixel 7.
Those that are looking for a new TV, Sony has you covered here. It’s A80L OLED TVs are on sale starting at $1,,698. Which is not bad for a high-end OLED TV, to be quite honest. Sony’s Mini LED TVs are also discounted to $1,998. If you’re looking for something a bit cheaper, there’s the X80K series which is now down to just $778. That’s a pretty good price for a high-end 55-inch TV.
These are just some of the very many Amazon Prime Day deals available still today, and you can check out more here. If you need an Amazon Prime free trial, you can grab that here (students get 6-months free, here).