In October we reported that the data of as many as seven million 23andMe customers were for sale on criminal forums following a password attack against the genomics company.
The amendment says that an investigation showed that the attacker was able to directly access the accounts of roughly 0.1% of 23andMe’s users, which is about 14,000 of its 14 million customers. The attacker accessed the accounts using credential stuffing which is where someone tries existing username and password combinations to see if they can log in to a service. These combinations are usually stolen from another breach and then put up for sale on the dark web. Because people often reuse passwords across accounts, cybercriminals buy those combinations and then use them to login on other services and platforms.
With the breached accounts at their disposal, the attacker used 23andMe’s opt-in DNA Relatives (DNAR) feature—which matches users with their genetic relatives—to access information about millions of other users. According to a spokesperson the DNAR profiles of roughly 5.5 million customers could be accessed in this way, plus the Family Tree profile information of 1.4 million additional DNA Relative participants.
The 5.5 million DNAR Profiles contained sensitive details including self-reported information like display names and locations, as well as shared DNA percentages for DNA Relatives matches, family names, predicted relationships, and ancestry reports.
For a subset of these accounts, the stolen data might contain health-related information based upon the user’s genetics.
The 1.4 million Family Tree profiles contain display names and relationship labels, plus other information that a user may have added, including birth year and location.
23andMe is in the process of notifying users impacted by the incident. The company said it believes that the attacker activity is contained, and that it is working to have the publicly-posted information taken down.
When the breach was first announced, 23andMe urged its users to ensure they have strong passwords, to avoid reusing passwords from other sites, and to enable multi-factor authentication (MFA).
Our Mark Stockley noted at the time:
“Respectfully, we would like to see 23andMe reach a different conclusion. Telling users to choose strong passwords and not to reuse them is great advice that just isn’t working. It’s good in theory but fails in practice. In a world where users have tens or even hundreds of logins to manage, password reuse and weak passwords that are easy to remember are inevitable.”
“We have taken steps to further protect customer data, including requiring all existing customers to reset their password and requiring two-step verification for all new and existing customers. The company will continue to invest in protecting our systems and data.”
Data breach
There are some actions you can take if you are, or suspect you may have been, the victim of a data breach.
Check the vendor’s advice. Every breach is different, so check with the vendor to find out what’s happened, and follow any specific advice they offer.
Change your password. You can make a stolen password useless to thieves by changing it. Choose a strong password that you don’t use for anything else. Better yet, let a password manager choose one for you.
Enable two-factor authentication (2FA). If you can, use a FIDO2-compliant hardware key, laptop or phone as your second factor. Some forms of two-factor authentication (2FA) can be phished just as easily as a password. 2FA that relies on a FIDO2 device can’t be phished.
Watch out for fake vendors. The thieves may contact you posing as the vendor. Check the vendor website to see if they are contacting victims, and verify any contacts using a different communication channel.
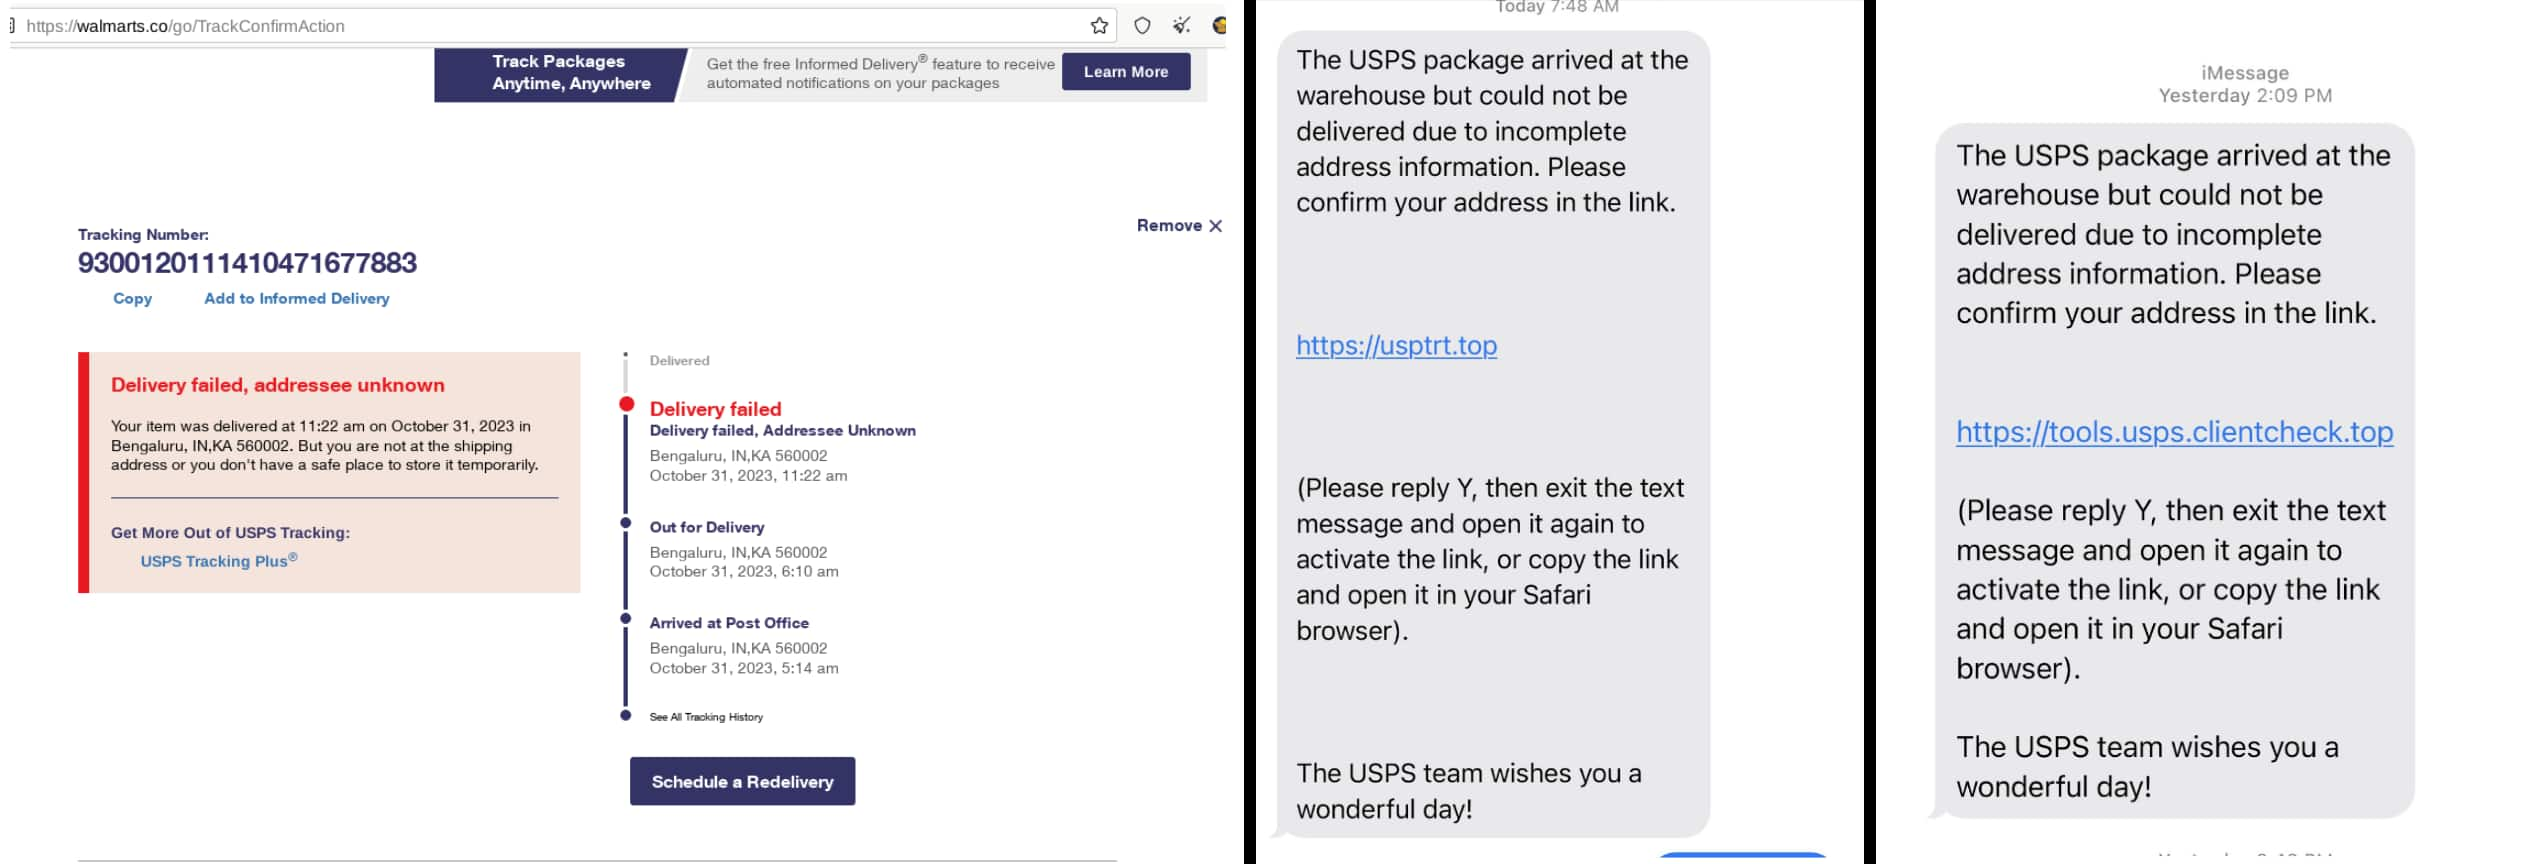
Take your time. Phishing attacks often impersonate people or brands you know, and use themes that require urgent attention, such as missed deliveries, account suspensions, and security alerts.
Set up identity monitoring.Identity monitoring alerts you if your personal information is found being traded illegally online, and helps you recover after.
We don’t just report on threats – we help safeguard your entire digital identity
Cybersecurity risks should never spread beyond a headline. Protect your and your family’s personal information by using Malwarebytes Identity Theft Protection.
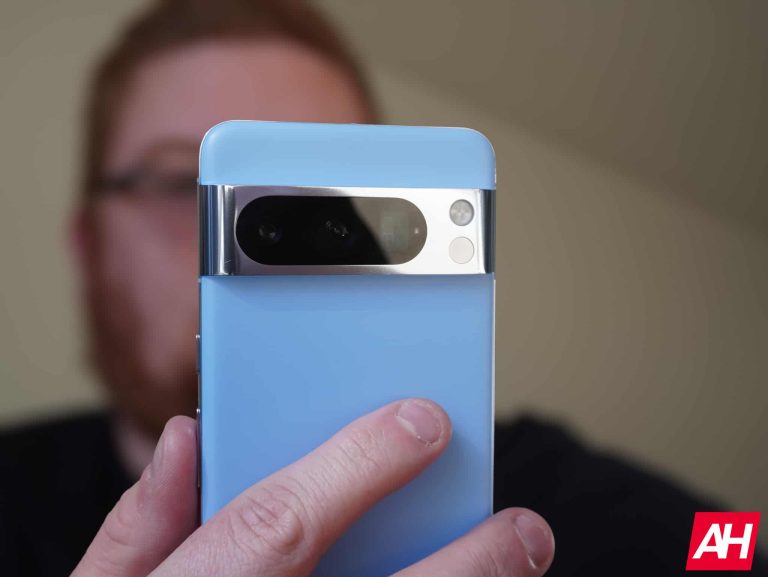
With the Pixel 8 Pro this year, Google decided to add a new sensor to the back of the phone. That’s a thermometer. This sounds pretty cool in theory, especially as we’re still coming out of the pandemic, and it’s trying to start up again. It’s a pretty simple sensor, and it’s pretty easy to use. You can use the thermometer to see how hot your coffee is if you have a fever or really anything else.
However, it’s important to note that this thermometer has not been cleared by the FDA yet. It is in the process of being approved (or disapproved) by the FDA, but that hasn’t happened yet. So, whatever temperature you get from your forehead, be sure to take that with a grain of salt.
Today, we’re going to show you how you can use the thermometer on the new Google Pixel 8 Pro. Unfortunately, this is only available on the Pixel 8 Pro; the regular Pixel 8 misses out on this one.
How to use Pixel 8 Pro’s Thermometer
First up, you’re going to need to install the app. For whatever reason, the app is not in the app drawer. So if you search in the Google Search bar on your phone for “Thermometer,” you will see a pop-up for the app. Just tap on “Update.”
From there, you will see the app available in the app drawer, so you can quickly jump into that app and start using it.
Once you have the app installed on your phone, open it up.
Now, you will see a pretty simple UI here. With a big button in the middle to “measure.” But there’s also a button towards the bottom that shows an actual thermometer and will say “default” or something else depending on if this is the first time you’ve opened the app. Tap on that button.
Here, you can choose what material you are measuring. This includes Default, Food & organic, Beverages & water, Cast iron, Ceramic and glass, Matte metal, Shiny metal, Plastic & rubber, Fabric, Wood, and Walls & Window. Tap on what you want to measure. Then hit done.
Now, you’re ready to measure. Hold the thermometer sensor, which is right below the flash and to the right of the camera sensors, about 5cm or 2 inches away from the object. Now tap on “Tap to measure”.
You’ll see the temperature. If it’s really cold, it’ll turn blue, and if it’s really hot, it’ll turn red. But most of the time, it’ll be black.
If you want to measure it again, you can tap on the circle arrow icon at the bottom to refresh it. And then tap to measure again. The app doesn’t keep track of your measurements, so once you hit the refresh button, that measurement is gone.
And that’s how easy it is to use the thermometer on the Google Pixel 8 Pro.
Can I measure my own temperature with this thermometer?
Not yet. As mentioned earlier in this article, the thermometer on the Pixel 8 Pro has not yet passed through FDA clearance. So, while you can technically hold this up to your forehead and get your temperature, it likely won’t be very accurate. Especially since you can’t choose “skin” as something you’re measuring yet.
That should hopefully come soon, though. Especially since we have seen leaks of a video, Google had prepared showing you how you can take your own temperature with this sensor.
Can I switch from Fahrenheit to Celsius?
Yes, you can! In the upper-right-hand corner, next to the three dots, you’ll see either a °F or °C. Just tap on that to switch to the other unit of measurement. It’s just that easy.
Is this sensor available on the Pixel 8, too?
Unfortunately, no. Google opted to only put this on the Pixel 8 Pro. This is likely done as a way to differentiate the two devices, along with a few other features. This might change on the Pixel 9 next year if Google does decide to keep the sensor. But Google could also ditch it as it did with the radar sensor called Soli on the Pixel 4 XL back in 2019.
It’s 2077, and it’s my first time back in Night City in quite some time. I’d forgotten just how bright the city lights can be. The buildings are lit with vivid hues of bright greens, blues, pinks, reds, oranges, and just about every other color you can think of. No matter the time of day, the city is always alive and bustling with people. None of them are the wiser to my dealings as V the street kid working to get the president to safety.
Just then, I come back to reality and I remember that I’m not back in Night City. I’m sitting in my chair playing a game. But it’s hard to tell the difference when you’re playing a game like Cyberpunk 2077 while you have the Nanoleaf 4D hooked up. The Nanoleaf 4D is a screen mirroring and light strip kit that reflects the colors from your screen onto the wall behind your TV.
The kit is made up of an RGBIC light strip that sticks to the back of your TV, a controller box with buttons for power and changing effects, and a camera. The camera points at your screen and captures the colors on it, which then syncs to the light strip to reflect those onto the wall.
I’ve been using it while watching movies and playing games and it’s got me convinced that Nanoleaf 4D is a truly transformational entertainment experience. Expanding the visuals of that entertainment beyond the borders of your TV to make the content more immersive. And it’s the only way I ever want to play games or watch movies now. But how does it truly stack up? That’s what this review aims to break down.
Nanoleaf 4D review: Setup
Setup for the Nanoleaf 4D was a relatively painless process for me and I think it would be for anyone who picked it up. Sticking the light strip to the back of my monitor took just a few minutes. And honestly, it was more of a pain taking the monitor down than getting the light strip onto it. After getting the light strip in place, you just need to plug the controller box into a power source, then connect the light strip and camera to it.
What I like about the Nanoleaf 4D camera is that it can be configured in two ways. You can either place it on a flat surface so it stares up at the screen or clamp it to the top like you would a webcam so it stares down at the screen. This gives the user options. You might already have a webcam on top of your TV or monitor. In which case the Nanoleaf 4D camera wouldn’t be a good fit for this configuration. Not to worry though because you can just lay it flat on the desk or entertainment center using the included stand.
For me, this wasn’t an option because I have a center channel speaker sitting where the camera would need to go. So I’ve opted to clamp it to the top of the monitor which works just as well. After connecting the equipment, your last step is just to launch the Nanoleaf app and get everything connected to your Wi-Fi network. Getting everything connected in the app took me just a few minutes so all-in-all, setup for everything took maybe 15 minutes. Not too bad and worth the minor time investment I think.
The Nanoleaf 4D light strip comes in two sizes. One for 65-inch TVs and one for 85-inch TVs. I’m using mine with a monitor smaller than 65 inches, so I have the 65-inch light strip kit. The nice thing is that you can trim the light strip to fit your TV or monitor which I had to do since my monitor is under 50 inches. The kit also includes four corner brackets you can stick to the back of the TV to route the light strip through. This helps it to bend around the corners more easily as the light strip is kind of stiff. That being said they aren’t required. But I do recommend using them since it just kind of keeps things more nice and neat.
Nanoleaf 4D review: Features
You can do more than you’d think with the Nanoleaf 4D. Yes, it is just a light strip. But there are multiple modes you can flip between based on how you want the lights to look. These include the 1D, 2D, 3D, and 4D mirroring modes. With 1D the camera will only capture the most dominant color on the screen at the time and use that to reflect onto the wall. This is perfect for any kind of content that doesn’t have a lot of color-shifting.
But in most cases, I felt the colors and the experience were more accurate when using 3D or 4D. Especially if you’re playing games like Cyberpunk 2077, Starfield, and Final Fantasy XIV. Or any other game where there are lots of colors and lots of action happening. I also used it to play games like Ghost of Tsushima and Call of Duty: Modern Warfare III on PS5. Which can be pretty fast-paced and cause colors to shift around a lot.
All of these can be activated inside of the app with the tap of a button. It does take a second or two for the camera and light strip to catch up to your choice in the app. But otherwise, the change happens pretty quickly and I didn’t experience any issues with it. You can also adjust the brightness of the lights and sync them up to music playing so they breathe with the beat. This is a nice touch if you stream music on your TV or PC. But for the most part I never really used this function.
The Nanoleaf 4D also supports Razer Chroma. So if you’re using it with your PC monitor, you can launch the Nanoleaf desktop app and access the Chroma mode. This works great when you play games that have Chroma support. The visual appeal is even better if you have Nanoleaf’s bulbs or light panels. You can use the Sync+ feature to sync the light strip and those other products together too. Plus, the sync works for both the mirror modes and Razer Chroma.
Basic effects and Scene effects
In addition to the 4D effects, Nanoleaf 4D also supports a Basic effect and a Scene effect. The Basic effect is what you’d want to use if you want the light strip to reflect a specific color. I would sometimes use this effect when reading manga or other books. And try to choose a color that I felt was fitting for the material. For instance, while reading through Akira I tend to lean toward a bright red color. I felt like this set the mood for the kind of content I was reading.
The Scene effect is a bit different. These will be preset colors made into a scene with a specific set of effects that will cycle through colors or reflect a static color combination. For example, the Game Night scene cycles through magenta, orange, and cyan-like colors. Morning Routine on the other hand will be a splash of white and a couple of really muted light blue colors. I often use this one while working just for some extra light in the room during the day.
You can also create your own scene and create multiple colors and motions to make something unique to you. There’s also a fair amount of preconfigured color collections to start with. What’s neat is that there’s now a Magic Scene option where you type in a word or phrase and let the app create a scene for you based on the word or phrase you used. For instance, I typed in Tokyo Night Life and it gave me a scene that cycled through different shades of blue.
There’s a decent level of customization to how you want the lights to look. Though again, I’ll always recommend 3D or 4D mirror modes for most games and movies.
Nanoleaf 4D Review: Performance
Since this is an RGBIC light strip it can display multiple colors on the strip simultaneously, which is part of the magic of how everything works with this kit. In my experience, the performance of the Nanoleaf 4D has been pretty good. While I don’t necessarily recommend using the 1D or even 2D mirror modes as often, the 3D and 4D mirror modes are great for pretty much everything.
There are also three different vibrancy modes – Cinematic, Vivid, and Custom. Vivid is what I used for most of my time spent with the Nanoleaf 4D but it’s not always the best option. While watching certain TV shows I found that switching things to the Cinematic vibrancy setting was a better way to go. Colors are a little more muted and subtle so they don’t feel like they’re overwhelming the scene. And this was one of my only complaints with the setup. Sometimes with Vivd active things just get too busy and it takes a little bit away from the viewing experience.
If you want a little more control over what colors are being reflected you can use the Custom Vibrancy mode. This lets you adjust dynamic range, saturation, and white balance so you can find the right amount of color for whatever you’re watching or playing. You can still set these with any of the mirror modes too. So if you prefer the 4D mode like I do, you can keep it there and then tweak the colors with Custom Vibrancy until you find your perfect balance.
I did feel though that Custom isn’t necessarily what you want for every single piece of content. For a game like Cyberpunk 2077 for example, Vivid is a much better experience. The game was designed to be awash with color and Vivid really brings every scene to life. But if you’re playing something more casual, you might want a more muted or custom-tuned vibrancy level.
Nanoleaf 4D review: Security/Privacy
I’ll start by saying there isn’t an issue here with security but with the given rise of concern about privacy these days, I feel it’s worth mentioning. The 4D kit does have a camera but it’s pointed at the TV at all times so it’s ever facing outward when in use. And even then, should you wish to disable the camera you can. This can be done by either turning it off in the Nanoleaf app or by using the power button on the controller box.
More importantly, though, there’s a lens cover you can magnetically attach to the camera so it’s covered up. This cover also magnetically attaches to the backside of the camera. I found this to be a simple yet nice touch for the design. Because it ensures that I will never lose the lens cover and it always has a place to sit. You can simply flip it back and forth.
Nanoleaf 4D review: Software
You can manage all of your 4D settings either in the desktop app or on the mobile app. However, which one you use will depend on where you have the strip attached. If you’re using it with your PC monitor like I am, you can just use the desktop app, and all of the features are there. That being said, using the mobile app is often much more convenient. Whenever I was using the lights I was almost always either watching or playing something.
And if I wanted to use the desktop app I’d have to pause whatever that content was and tab out of it. Which is kind of a hassle and for me, feels like it breaks the immersion. And I kind of see the immersion as the whole reason for wanting the Nanoleaf 4D in the first place.
You’ll also have to use the mobile app if this is hooked up to your TV since there’s no TV version of a Nanoleaf app. Again though, there’s complete feature parity so it doesn’t matter which app you use. Both will do everything needed and give you access to all of the Nanoleaf 4D’s features.
While the app is intuitive to use, it does have the occasional problem with connection. This can usually be solved by simply closing out the app and relaunching it. But this can feel like a little bit of a nuisance if it happens too often. It’s not happening every time I use the lights. But weird little disconnect issues are popping up more than I’d like. Sometimes I’d open the app up and the Nanoleaf 4D would just be listed as “unreachable.” And I’d have to relaunch the app to get it to recognize the lights.
This may also simply have to do with my Wi-Fi network. Since the router is on the other side of the apartment. Luckily, if it’s not related to my network, it should be something that Nanoleaf can fix with a software update to the app. And I have noticed much better reliability with things since at least the most recent update.
Nanoleaf 4D review: Smart home integration
Nanoleaf 4D supports both Google Assistant and Amazon Alexa. So if you like, you can use the Nanoleaf 4D with either of these by issuing some voice commands. This does however seem to be limited to turning the lights on and off. This is essentially just a quick way to enable or disable the lights. I find this to be most useful if I want the lights turned on before I get home. If you want the rest of the features then you’ll need to use the proper Nanoleaf app for all that other stuff.
Still, it’s nice to see that smart home integration is available for those that want to use it. Especially if you already have quite a few other smart home products hooked up in your home or apartment.
Should you buy the Nanoleaf 4D?
If you want to transform your entertainment into something that feels truly magical, you definitely should buy the Nanoleaf 4D. It’s easily one of the best things that’s been added to my entertainment setup in the past few years. Its versatility makes it perfect for really any setup. Whether that’s strictly for movies and TV or if you want to throw in some video games too. And what’s nice is that this works with both PC and console games. Unlike the Nanoleaf light panels and bulbs which have no way to read the colors coming off your console display.
As mentioned these can sync with the Nanoleaf 4D. After doing so, they’ll display the same colors that the Nanoleaf 4D is reflecting. But they won’t do it without it. This makes the Nanoleaf 4D an especially good purchase for anyone who already has other Nanoleaf lighting products set up. Because it adds to the experience and makes things even more immersive.
At a starting price of $99.99, the Nanoleaf 4D is also pretty affordable. And it’s quite a bit easier to set up than the light panels. Overall these have been a wonderful experience for entertainment content. If you like movies and video games, you most definitely want these for your own setup.
Nothing, the company by OnePlus co-founder Carl Pei, is prepping up for the Nothing Phone (2a)’s global release. The company has already successfully launched its first two smartphones, the Phone (1) and Phone (2). Now, it’s turning its attention to the more affordable variant of its handsets. The Nothing Phone (2a) is likely to compete against Google‘s upcoming Pixel 8a.
The Nothing Phone (2a) appears on India’s BIS certification
A new Nothing Phone bearing the model number A142 has been spotted on India’s BIS certification website (via MySmartPrice). It hints at the imminent launch of the Nothing Phone (2a). This aligns with an earlier report from GSMChina, which also suggested that the A142 is the Nothing Phone (2a). While the BIS certification doesn’t divulge the device’s specifications, Android Authority has provided some insights into its specs.
This upcoming smartphone marks Nothing’s foray into the affordable tech segment, following the recent launch of the CMF by Nothing brand, which offers affordable earbuds and smartwatches. The Nothing Phone (2a) may be the next step in this direction.
The Nothing Phone (2a) may have a better battery and a different chipset
Android Authority reports that the upcoming Nothing Phone (2a) will sport a considerably larger battery than its predecessor, the Nothing Phone (2). The Phone (2a) may feature a 4920mAh battery, surpassing the 4500mAh battery of the Phone (2). This enhanced battery capacity should translate into improved battery life for the Phone (2a).
However, the display and camera may remain similar, with only minor changes. If that’s the case, then Nothing might be bringing some flagship-level specs down to its affordable handset. This is something that we’re seeing with the Google Pixel “A” phones.
The other significant change is the chipset. The Nothing Phone (2) utilizes the Qualcomm Snapdragon 8+ Gen 1 chipset, but the Nothing Phone (2a) is expected to adopt a new, yet-to-be-confirmed chipset. It may offer superior performance and better efficiency.
Samsung is preparing to launch five new flagship Windows laptops soon. The Galaxy Book 4 series will arrive with unprecedented on-device AI capabilities, spearheaded by the Ultra model. While the company hasn’t officially announced the launch date, the Korean media reports that the laptops will go official on December 15. The products may arrive on the market later this month or in early 2024.
The Galaxy Book 4 series is coming later this month
Samsung’s new laptops include the standard Galaxy Book 4, Galaxy Book 4 360, Galaxy Book 4 Pro, Galaxy Book 4 Pro 360, and Galaxy Book 4 Ultra. The two “360” versions feature a 360-degree hinge, allowing you to fully rotate the screen back for a tablet-like experience. The Ultra model, meanwhile, is the most powerful of the lot.
Earlier leaks have given us a fair idea of what to expect from the new Galaxy Book lineup. According to the Korean publication Yonhap, Samsung is readying the “world’s first artificial intelligence (AI) laptop.” Its newly launched generative AI model, Samsung Gauss, will power the on-device AI features. The model processes all AI tasks locally, so your data doesn’t leave the device.
The report adds that Samsung originally planned to launch the Galaxy Book 4 series in early 2024, possibly alongside the Galaxy S24 series. However, it decided to unveil the devices early to earn the title of the “world’s first AI laptop.” LG and HP are also known to be working on new laptops with on-device AI features.
Interestingly, AI is one of Samsung’s main focus for the Galaxy S24 series as well. It is working on a so-called Galaxy AI experience with AI features baked into One UI. It is unclear if the Galaxy Book 4 will get the same AI tools as the upcoming flagship smartphones. If it does, the Korean firm may not detail everything during the laptop launch event on December 15. The Galaxy S24 lineup is expected in January 2024.
Samsung’s Ultra laptop will be available in multiple processor variants
Leaked specs last month revealed that the Galaxy Book 4 will feature Intel’s Core i9 185H processor. However, that may not be the only option. Samsung will reportedly also offer it with the Intel Core Ultra 7 155H chipset. Other known specs include a Samsung SDC4188 display with a 2880×1800 pixels resolution, a 120Hz refresh rate, and touch functionality, 32GB of LPDDR5X RAM, 1TB of NVMe SSD storage, and Nvidia GeForce RTX 4070 GPU. Stay tuned for the official launch in about ten days.
In addition to the many new features coming to Google Messages soon in honor of RCS surpassing one billion monthly active users, the app is also preparing to unveil an update to its text field, introducing a dedicated shortcuts bar and a left-aligned layout.
Previously, the RCS/text message field occupied the right two-thirds of the screen, with key functions like “plus,” gallery, and Magic Compose disappearing as you typed. Emoji and voice memo shortcuts resided on the opposite end, creating a scattered and sometimes frustrating user experience.However, as noted by 9to5Google, this changes with the new layout which has the the interface cleverly splitting into two distinct lines as you start typing. The text field now takes a bold left-aligned stance, mirroring the flow of conversation. This shift is accompanied by a dedicated shortcuts bar that keeps “plus,” Magic Compose, the gallery (sporting a fresh icon), and the voice recorder readily accessible, regardless of text input.
Google Messages text field before redesign | Credit: Phone Arena
Google Messages text field after redesign | Credit: 9to5Google
The voice recorder feature is also no longer relegated to the sidelines, as it now gets its own button, possibly in preparation for its integration with the Moods feature announced last week. The new split-level interface, with the text field on top and the shortcuts bar below, might come across as jarring at first, but I believe will be beneficial as more features are added and more real estate may be needed for additional shortcuts.
Some early adopters in the Google Messages beta program are already seeing this text field transformation, though wider availability is yet to come. However, with Google actively rolling out the update alongside other noteworthy features announced earlier this week, it’s safe to say Google is putting all their weight behind making Google Messages a highly competitive messaging app and not afraid to roll out these changes more widely.
As much as you want to avoid it, the holiday season is upon us. This means that you have to start thinking about presents to get for your loved ones. There are a ton of different devices that you can buy for the tech-savvy person in your life. However, the issue is that there are so many options out there. Two options are the Motorola Moto Edge 2023 and the Samsung Galaxy S23 FE. These are fantastic phones, and they will make great gifts.
However, which one should you choose? Which one will give that special someone the best experience to kick off the New Year? Well, that’s what I’m here to explain. I personally tested and reviewed both of these devices, and I’m going to give you my honest opinion of which one you should buy.
I’ll be going over key aspects of each device including the display, build quality, camera, speaker quality, performance, gaming performance, battery performance and software. Maybe you’ll find one device objectively better than the other; maybe it’s a toss up and you just wanted to know a little bit more about each device before making your decision. In any case, you’re going to hear the good, the bad, and everything in between. So, without further ado, let’s dive into this comparison!
Moto Edge 2023 vs. Galaxy S23 FE: Design and build quality
Starting off with the very first impression that you get from these phones, it’s clear that Motorola and Samsung went in completely different directions with the designs. Samsung went for a very over-the-top, premium, and flashy design. The outside of the phone is clad in reflective glass. Everything is accented with bright metal from the frame to the camera package. This is the kind of phone that’s meant to stand out. It blends flashy materials with a simple design. Also, it’s meant to look just like its more premium counterparts.
Where the Galaxy focuses on flashy flamboyance, Motorola focuses on understated elegance. The phone is covered in a rubbery leathery material. In my review, I said it looks like the smartphone equivalent of James Bond; a dashing, debonair, business suit-clad spy. It’s like a phone wearing an Italian suit.
In terms of thickness, the Galaxy phone is a behemoth compared to the Motorola. The S23 FE is extremely thick and sits heavily in the hand. It’s one of the thickest phones that I’ve ever reviewed. As for the Moto edge 2023, this phone is incredibly thin. Think about phones like the Galaxy S6 from back in the day; back when there was a race to make phones as thin as possible. It’s razor thin by phone standards.
Build quality
While the Motorola phone is very thin, it does not mean that it’s poorly built. Picking it up, I didn’t get the sense that it was thin, I got the sense that it was dense. Everything is tightly packed so it still feels like you’re holding a solid device. All the components used to make the phone are high quality. The frame is made of metal, the glass is sturdy and heavy, and the back material feels nice and high-quality. While paper-thin, it does not mean that Motorola skimped on the materials.
That’s not to say that the Galaxy S23 FE is a slouch either. It doesn’t feel quite as dense as the Motorola handset, but it uses premium materials like sturdy glass and a metal frame. These give it an extremely premium feel in the hand. Also, it sits very heavily in the hand, letting you know that you are holding a well-built phone that will last you a while.
Just like with the designs, the companies focused on two completely different angles for the build quality. For Samsung, the bigger the better. This is a huge phone, and it’s meant to feel big and heavy to give you that security. With Motorola, less is more. It has a thin design that sits comfortably in the pocket but still feels like a quality solid piece of technology.
Moto Edge 2023 vs. Galaxy S23 FE: Display
When it comes to the displays between these two phones, I had a hard time comparing them. They’re both just so damn amazing! Okay, let’s get the obligatory technical details out of the way. Catch me if you heard this before: they come with OLED displays which mean more saturated colors, deep blacks, and better contrast; *yawn*.
Both of these phones use similar screen technologies, but it all comes down to the calibration between them. I expected the Galaxy S23 FE to deliver the punchiest colors. The screen on the Galaxy A53 5G from last year was incredibly packed with color. This year, I felt that Samsung toned the colors down just a bit. Don’t get me wrong, there’s still plenty of juice. However, I felt that they could have gone just a step further with the colors. There are points where the display felt just a tiny bit bland for Samsung’s standards.
However, the Moto Edge 2023 display took those extra steps and delivered an amazing balance between saturated and oversaturated. The colors are very juicy, bright, and warm. Everything I saw on this screen just jumped out at me. The Motorola Edge+ 2022 from last year didn’t really wow me with its colors. Sure, they were punchy at points, as per standard OLED performance, but I didn’t feel that the display itself was of high quality. That $1,000 phone’s display was beaten by the Galaxy A53’s display, and that phone was about half the price.
So, in terms of colors, I prefer the Moto Edge 2023’s display. It gave me a truly cinematic experience. Watching movies and shows was just more pleasant on this phone than with the Galaxy S23 FE. This wasn’t just because the display was more saturated, however. It also came to how the display handles them. They were saturated, but they were also very balanced, and there was a certain warmth to them that made them seem much more pleasant.
Brightness
Brightness is another important factor of a display, and this is another area where I struggled to compare these two phones. I feel like the peak brightness of both of these displays is about the same. They both boost their brightness when they’re in direct sunlight, and they brighten to the point where I can read everything on the screen perfectly fine. I think that when it comes to brightness, these phones are pretty much neck and neck.
Additional settings
Both displays have options for additional adjustments. You can adjust the color temperature in the overall color profile of the Motorola display, but Samsung takes it a bit further. You’re able to dial in the exact red, blue, and green values of the display along with the color temperature.
Overall, if you want a more colorful and punchy experience for watching your favorite movies, I will definitely go for the Motorola. Its display is big, bright, and beautiful. However, that’s not to say that the Galaxy’s display is a slouch by any means. You’re still going to get an incredibly colorful and pleasant experience.
Moto Edge 2023 vs. Galaxy S23 FE: Speakers
Moving on to the speaker quality of these two phones, there is a winner in my book. Both phones come with Incredible speakers with great bass, great focus on the highs, and an overall balanced sound. Also, both phones have a suite of adjustments that you can make to the sound along with Dolby Atmos integration.
One main difference between these phones is the fact that the Moto Edge 2023 has Dolby Atmos enabled by default, and there’s no way to disable it. That wasn’t really an issue for me, however.
So, when it comes to the actual speaker quality, both phones are amazing. But, which phone won? I give the title to the Motorola Edge 2023. While listening to the Galaxy’s speakers, everything sounded great, but I did wish that there was a bit more punch in the low end. Also, the vocals just did not have as much bite as I wanted. The singer’s voices tended to blend with the rest of the music for the most part.
In the case of the Moto Edge 2023, the company managed to find an astounding balance between the high and low end. While listening to music, everything sounded extremely balanced. The low end supported the high end perfectly, and the high end kept from being too loud and shrill. Additionally, the sound was so extremely detailed that I could hear extremely fine details in the instruments while listening to classical music. I could literally hear the texture of lower string instruments. Also, the voices sounded extremely crisp and clear and did not blend with the rest of the music.
Motorola blew me away with the speaker quality on this phone. The Galaxy S23 FE has incredible speakers, but I think that the Motorola Edge 2023 just took it a few steps further. Both phones have an incredible Suite of tools to adjust the sound. With all of the adjustments made, I still feel that the Motorola phone just did a better job at creating a little balanced sound.
Moto Edge 2023 vs. Galaxy S23 FE: Camera
So, while both phones performed admirably in this regard, there is one clear winner. I chalked this one up to one key aspect of the cameras, and it’s a pretty big one.
Overall, both cameras produced great pictures with nice contrast, solid exposure, and good details. I couldn’t really find a clear winner in any of these respects, because those are pretty subjective aspects of the camera experience. Not as much for the details, but I did find that both phones produced a similar level of detail with their cameras.
In terms of low light performance, both phones also did a great job, though I did feel that the Galaxy phone delivered more consistent results. Some of the low-light pictures from the Motorola phone turned out extremely blurry. However, that wasn’t too often.
So, which phone is the winner? Well, we haven’t talked about color reproduction yet. Samsung has long been the company known for boosting its colors to infinity and beyond. Its phones usually offer more color saturation than other phones. You can naturally assume that that’s the case with this comparison, but it’s not.
I have no idea what Motorola was thinking with this camera, but the colors were pushed far past what could be considered acceptable; they were overly cartoonish and punchy. It’s as if the phone took each picture, rendered them, and then boosted the saturation to 100% in Picsart. Each picture added so much more color than what the scene produced.
The sky had an impossibly blue tone that doesn’t occur in nature. Flowers almost seem to radiate, and even pictures of dull environments had a pop of color that changed the mood of the scene. I think that the Galaxy did a much better job with restraint. The pictures It produced were very well balanced in the color department. I tip my hat to the Galaxy S23 FE’s camera.
Moto Edge 2023 vs. Galaxy S23 FE: Performance
In terms of General performance, I feel that both phones did a great job. While using either phone, I did not experience any stutters or lag throughout the software. Any instances that did happen were few and far apart and negligible. Both phones glide in and out of apps smoothly with no hiccups. Also, both phones have snappy performance, and you will not have a bad time with any of them.
Gaming
Now, let’s talk about gaming. This is where the Galaxy S23 FE pulls ahead. The Motorola Edge 2023 is an admirable performer when it comes to playing most games. It was even able to hold its own pretty well with intense games such as Genshin Impact and Honkai Star Rail. The performance was decent.
However, while Motorola was decent, Samsung was exceptional. Using the Moto Edge 2023, I was able to play these games at the highest graphical settings with an acceptable amount of stutter and drop frames. At worst, I was able to get around 30fps.
However, with the Galaxy S23 FE, I was able to pretty much get a consistent 60fps performance. The phone never slowed down when playing these graphically intensive games. So, if you’re more of a mobile gamer, then you will definitely appreciate the performance of the Galaxy S23 FE more.
However…
The Galaxy S23 has a pretty major problem when it comes to the heat performance. Using the Motorola phone, it definitely got warm. After playing Genshin Impact for a bit, I could feel the screen heating up a bit.
However, I was still able to enjoy my time playing it. In the case of the Galaxy S23 FE, this phone heated up immensely. After about five minutes of playing Genshin, it started heating up to the point where it became uncomfortable to hold. I chalk that up to the heating issues with the Snapdragon 8 Gen 1.
Moto Edge 2023 vs. Galaxy S23 FE: Battery
In terms of battery life, both phones gave me admirable performance. Using both of these devices, I was able to get about a day and a half of battery life with moderate to light usage. I didn’t feel that any phone was exceptionally better or worse than each other. My usage consisted mostly of casual social media scrolling, a fair amount of video watching, a fair amount of gameplay, and a bit of camera use.
I would end the day with a good amount of battery power left in the tank. I’d say that the S23 FE will give me just a bit more juice at the end of the day. It’s negligible, however. The battery performance of these phones is pretty neck and neck, and you won’t have a bad time either way.
When it comes to charging speed, the Motorola Edge 2023 has a clear advantage. The Galaxy S23 FE caps out at 25W for charging, and it does not come with a charger in the box. However, the Moto Edge 2023 comes with an included 68W charger. This will charge the phone in just under an hour.
Yes, I know that faster charging speeds degrade the battery faster over time. However, you still have the option for faster charging with the Moto Edge 2023. It’s your choice to choose faster or slower charging to conserve battery longevity. However, having the option for faster charging is still a plus.
Moto Edge 2023 vs. Galaxy S23 FE: Software
This is an area where most casual Tech users might not be the most passionate. However, it’s still worth noting. Do you want a more vanilla Android experience, or do you want a more customized Android experience? Samsung’s One UI software is a heavily customized and skinned version of Android. This has Samsung’s optimizations in the software, and that gives it its own unique feature set.
Motorola has long kept pretty close to stock Android with its software. It’s basically stock Android with a few of Motorola’s specific features added. So, when it comes to the software, it all depends on whether or not you want an experience closer to what Google offers with its Pixel phones. If you want a more stock Android experience, then you may want to go with Motorola. However, if you want a more customized version of Android, then you will want to go with the Galaxy S23 FE.
Final Verdict
So, which one should you choose? Overall, I think that when it comes to objective departments, the Galaxy S23 FE takes the cake. Things like color reproduction with a camera, low light consistency, and performance are pretty objective, and these are areas where the Galaxy S23 FE grabs a victory from the Moto Edge 2023.
The Moto Edge won my heart when it came to the display, but that’s a very subjective matter. Also, I prefer the feeling in the hands of the Edge 2023, but that is also pretty subjective. I’d say the main objective victory that Motorola snagged was the speaker quality. The low-end performance was much better and the sound was more detailed with better vocals.
Overall, if you’re looking for a Christmas gift to buy that tech-savvy loved one of yours, then you may want to opt for the Galaxy S23 FE. It costs $599, just like the Moto Edge 2023. It’ll offer better gaming performance and a better camera experience.
However, that’s not to say that the Motorola Edge 2023 is a slouch at all. You can still expect an incredible experience with this phone. Also, if you’re a Motorola fan, and you are more familiar with the software, then you may want to opt for this phone, as it’s still an amazing device.
In its most recent update, Chrome has addressed a total of seven security bugs. Among them is CVE-2023-6345, which stands as the only zero-day vulnerability. In the update, Google acknowledged that “an exploit for CVE-2023-6345 exists in the wild.” This marks the seventh zero-day vulnerability Chrome has tackled since the beginning of the year, as reported by The Hacker News.
Zero-day vulnerabilities pose a significant threat as they are security flaws that hackers can exploit before developers can release a fix. This leaves organizations exposed and needing more preparation time to protect their systems. The complexity required for their discovery makes these vulnerabilities rare and valuable to attackers. Cybersecurity efforts are concentrated on rapid detection and collaborative actions to mitigate the impact of such threats.
Google has confirmed the presence of a zero-day exploit for CVE-2023-6345, initially identified by Google’s Threat Analysis Group on November 24, 2023. The company has exercised caution in sharing details about this specific flaw. It is a common practice among tech companies, especially if they identify a flaw internally, to refrain from public exposure. While specifics about CVE-2023-6345 are limited, we know it is an integer overflow weakness affecting Skia. Skia is the open-source 2D graphics library within the Chrome graphics engine. Google’s update to Chrome notes that the exploit could “potentially perform a sandbox escape via a malicious file.”
Chrome zero-day vulnerability CVE-2023-6345 has a security severity of High
Let’s break down what all this means. Chrome uses SKIA, a 2D graphics library, to render web graphics. It’s the software behind Chrome’s visual components, significantly contributing to the display of graphics.
Integer overflows occur when an arithmetic operation on integers surpasses the maximum representable value for the data type, potentially leading to unpredictable behavior and posing security risks. Exploiting such weaknesses can result in serious consequences, including buffer overflows, memory corruption, and other security issues. Hence, addressing integer overflow is common in software development to ensure the security of applications.
CVE-2023-6345 exploited an integer overflow in Skia to potentially breach the sandbox. A sandbox is a protective mechanism designed to confine web content within a restricted environment, preventing access to sensitive system resources. The method of exploitation involved a malicious file, indicating that interacting with this file could enable an attacker to execute code or actions beyond the sandbox. Users being able to access data beyond the scope of what Chrome intends is a significant threat. CVE-2023-6345 has a security severity of High.
Researchers found numerous severe security vulnerabilities in the Ray compute framework that allow unauthorized access. Since the flaws remained unpatched until disclosure, the researchers warn users to refrain from using the service until relevant patches arrive.
Patch Awaited For Critical Ray Framework Vulnerabilities
In a recent post, cybersecurity firm Bishop Fox researchers elaborated on several vulnerabilities riddling the Ray framework.
Ray, as described, is an open-source unified compute framework that helps scale AI and Python workloads. The service facilitates businesses in developing and deploying large-scale AI models. It boasts many customers from different niches like Uber and Wildlife Studios.
Specifically, the platform exhibits three critical severity vulnerabilities affecting two of its components: Ray Dashboard and Ray Client. These vulnerabilities exist because the framework doesn’t adequately enforce authentication and input validation in these components. The three flaws include,
CVE-2023-48023 (critical): a code execution flaw that existed due to a lack of authentication in the default ray configuration.
CVE-2023-48022 (critical): an SSRF vulnerability in the Ray Dashboard API allowing code execution to a remote attacker.
CVE-2023-6021 (critical): an insecure input validation in the Ray Dashboard’s /api/v0/logs/file API endpoint allowing code execution.
Regarding the impact of these vulnerabilities, the researchers explained that a remote adversary may access stored files and scripts in the Ray cluster. And, in the worst scenarios, the attacker may also steal IAM credentials from the Ray framework installed in AWS to gain elevated privileges.
This makes it possible for unauthorized users to obtain operating system access to all nodes in the Ray cluster or attempt to retrieve Ray EC2 instance credentials (in a typical AWS cloud install).
According to the researchers, the vulnerabilities affect Ray versions 2.6.3 and 2.8.0. Bishop Fox discovered and reported the vulnerabilities to Anyscale – Ray framework vendor – in August 2023. While the vendors acknowledged their bug report, the vulnerabilities remained unpatched until the time of writing this story, indicating that all Ray users are exposed to potential threats.
Therefore, to avoid the risks, the researchers advise users to avoid using the platform until the developers patch the flaw.
Microsoft urges customers to install Exchange Server security patch and update WinRAR to thwart Forest Blizzard hackers.
In March 2023, Microsoft’s Threat Protection Intelligence team identified a critical vulnerability (CVE-2023-23397) that exposed Microsoft Outlook customers to potential exploitation by threat actors. The vulnerability allowed attackers to steal Net-NTLMv2 hashes and gain access to user accounts.
The vulnerability is caused by a specially crafted email message sent to a user. Upon opening the message, the user’s Net-NTLMv2 hash is transmitted to the attacker, who can subsequently leverage the hash to pilfer the user’s password.
Threat actor exploiting the vulnerability to gain unauthorized access to Exchange Server (1) – Threat actor activity to extend their access in a compromised environment by using a compromised e-mail account (2) (Credit: Microsoft)
Now, in an updated blog post, the team has revealed that it has found evidence that the vulnerability has been exploited by the threat actor group Forest Blizzard (aka STRONTIUM, APT28, and Fancy Bear) to attack organizations.
For your information, the group is thought to have affiliations with or support from the Russian military intelligence agency. Notably, this is the same group allegedly led by Russian GRU officer Lieutenant Colonel Sergey Alexandrovich Morgachev, whose email address was compromised by the Ukrainian hacktivist group Cyber Resistance in April 2023.
Forest Blizzard is known for its focus on critical infrastructure, including government entities, energy sectors, transportation systems, and non-governmental organizations. Its operations extend to the Middle East, the United States, and Europe.
In its December 4 blog post Microsoft also highlighted that as of September 2023, Forest Blizzard had exploited a 0-day vulnerability in WinRAR, which was initially identified in August 2023 (CVE-2023-38831). By that time, multiple Advanced Persistent Threat (APT) groups had already targeted 130 organizations, successfully pilfering funds from traders.
Despite the availability of a patch for WinRAR’s 0-day vulnerability, threat actors persist in targeting systems that continue to use the unpatched version of the software.
The good news is that Microsoft collaborated with the Polish Cyber Command (DKWOC) to counter Forest Blizzard’s actions. At the time of writing, Microsoft had released a patch for the vulnerability (CVE-2023-23397).
The patch is available for all supported versions of Outlook. Users are urged to install the patch as soon as possible.
Takeaway
Microsoft Exchange customers should promptly install the latest security patches and update to the latest version. Users of WinRAR are also advised to update to mitigate the risk of falling victim to the Forest Blizzard APT group.
In addition to installing the patch, users can also take the following steps to protect themselves from this vulnerability:
Use a strong password for your Outlook account.
Be careful about the email messages that you open.
Enable two-factor authentication for your Outlook account.
Do not open email messages from unknown senders or email messages that contain attachments.